USB to serial из Arduino Leonardo
Эта статья прежде всего будет полезна таким же начинающим в Arduino, как я.
Прикупил себе китайский клон pro mini (3.3V, ATmega328) и сразу же сел прошивать его любимейшим «blink», благо светодиод на 13-м пине есть и можно проверить успех миссии. Никакого переходника не брал, думая, что есть Leonardo, — разберёмся.
Почитав гайды на просторах рунета, в статьях, где было написано «прошивка pro mini», нашел только способ при помощи SPI. Таких статей море, и я не буду описывать принцип. Недолго думая, соединил все согласно распиновке, «вгрузить через программатор», и тишина: ни ошибок в IDE, ни запаха паленой пластмассы.
К слову pro mini у меня 3.3v, а Leonardo — 5v, но ничего, кроме ослепляюще яркого светодиода, не говорит что ей не нравится, так что смело втыкайте +5v на пин vcc.
Смотря на непонятный код «arduini as spi» и думая, что намудрил со скоростями, я решил найти что-то по-понятней и по-надежней.
Посмотрев в сторону конвертера [1] на камне ATmega16U2 и подумав что у меня ATmega32U4, то соорудить его не вызовет проблем, ведь хардварный USB есть у обоих.
Немного погуглив нашел статью [2], там нашел комментарий [3] с вот таким кодом:
/* USB to Serial - Teensy becomes a USB to Serial converter
   http://dorkbotpdx.org/blog/paul/teensy_as_benito_at_57600_baud

   You must select Serial from the "Tools > USB Type" menu

   This example code is in the public domain.
*/

// set this to the hardware serial port you wish to use
#define HWSERIAL Serial1

unsigned long baud = 19200;
const int reset_pin = 4;
const int led_pin = 13;  // 13 = Teensy 3.X & LC
                         // 11 = Teensy 2.0
                         //  6 = Teensy++ 2.0
void setup()
{
  pinMode(led_pin, OUTPUT);
  digitalWrite(led_pin, LOW);
  digitalWrite(reset_pin, HIGH);
  pinMode(reset_pin, OUTPUT);
  Serial.begin(baud);       // USB, communication to PC or Mac
  HWSERIAL.begin(baud);     // communication to hardware serial
}

long led_on_time=0;
byte buffer[80];
unsigned char prev_dtr = 0;

void loop()
{
  unsigned char dtr;
  int rd, wr, n;

  // check if any data has arrived on the USB virtual serial port
  rd = Serial.available();
  if (rd > 0) {
    // check if the hardware serial port is ready to transmit
    wr = HWSERIAL.availableForWrite();
    if (wr > 0) {
      // compute how much data to move, the smallest
      // of rd, wr and the buffer size
      if (rd > wr) rd = wr;
      if (rd > 80) rd = 80;
      // read data from the USB port
      n = Serial.readBytes((char *)buffer, rd);
      // write it to the hardware serial port
      HWSERIAL.write(buffer, n);
      // turn on the LED to indicate activity
      digitalWrite(led_pin, HIGH);
      led_on_time = millis();
    }
  }

  // check if any data has arrived on the hardware serial port
  rd = HWSERIAL.available();
  if (rd > 0) {
    // check if the USB virtual serial port is ready to transmit
    wr = Serial.availableForWrite();
    if (wr > 0) {
      // compute how much data to move, the smallest
      // of rd, wr and the buffer size
      if (rd > wr) rd = wr;
      if (rd > 80) rd = 80;
      // read data from the hardware serial port
      n = HWSERIAL.readBytes((char *)buffer, rd);
      // write it to the USB port
      Serial.write(buffer, n);
      // turn on the LED to indicate activity
      digitalWrite(led_pin, HIGH);
      led_on_time = millis();
    }
  }

  // check if the USB virtual serial port has raised DTR
  dtr = Serial.dtr();
  if (dtr && !prev_dtr) {
    digitalWrite(reset_pin, LOW);
    delayMicroseconds(250);
    digitalWrite(reset_pin, HIGH);
  }
  prev_dtr = dtr;

  // if the LED has been left on without more activity, turn it off
  if (millis() - led_on_time > 3) {
    digitalWrite(led_pin, LOW);
  }

  // check if the USB virtual serial wants a new baud rate
  if (Serial.baud() != baud) {
    baud = Serial.baud();
    if (baud == 57600) {
      // This ugly hack is necessary for talking
      // to the arduino bootloader, which actually
      // communicates at 58824 baud (+2.1% error).
      // Teensyduino will configure the UART for
      // the closest baud rate, which is 57143
      // baud (-0.8% error).  Serial communication
      // can tolerate about 2.5% error, so the
      // combined error is too large.  Simply
      // setting the baud rate to the same as
      // arduino's actual baud rate works.
      HWSERIAL.begin(58824);
    } else {
      HWSERIAL.begin(baud);
    }
  }
}
Изменив скорость на 57600 (в начале кода unsigned long baud = «скорость»), а какая нужна написано в C:Program Files (x86)Arduinohardwarearduinoavrboards.txt в строках похожих на pro.menu.cpu.8MHzatmega328.upload.speed=57600,
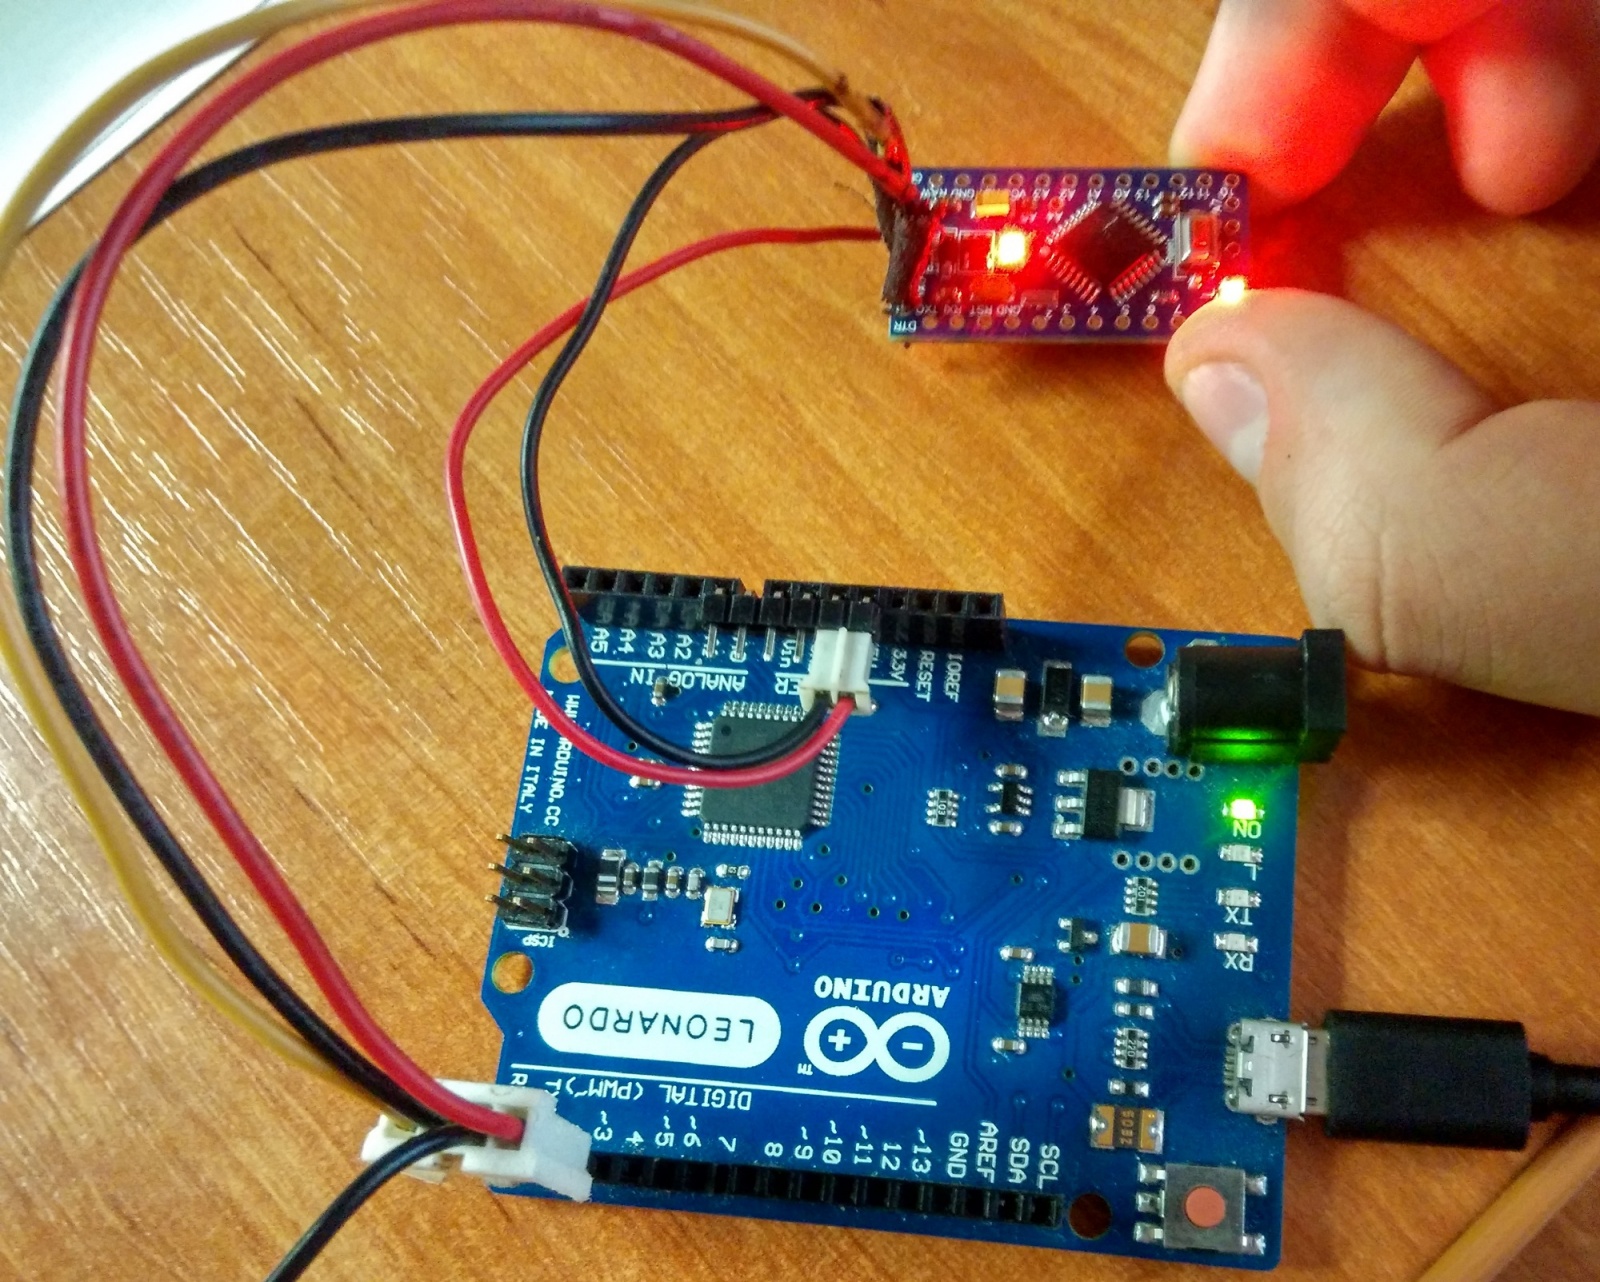
вгрузил его в Leonardo (источник пишет, что IDE не ниже 1.6.6). Пришла пора прошивать! Соединив все по несложной распиновке из источника:
Target processor --------------------------- Serial to usb converter

(Atmega 328p) ----------------------------- (Leonardo)

GND ----------------------------------------- GND

5V <------------------------------------------ 5V

RX <--- 1K --------------------------------- TX

TX ---- 1K ---------------------------------> RX

RESET <----||--------------------------------- DTR_PIN (here pin 13 4)

 | 100nF

 10K

 |

 5V
На скорую руку это выглядит примерно так:

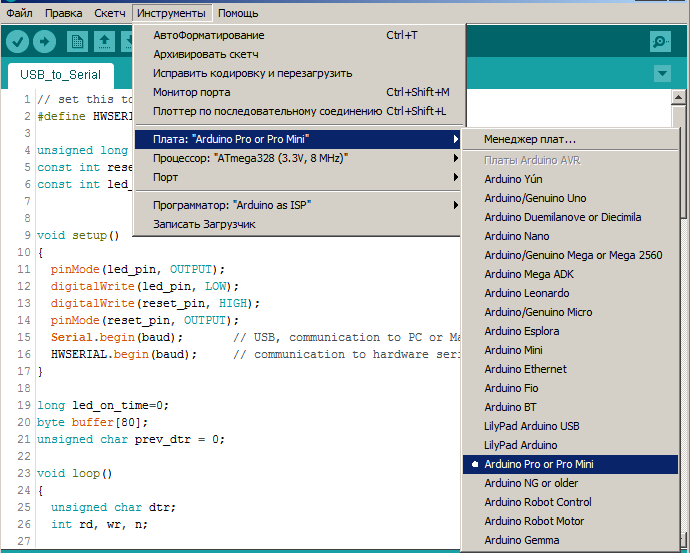
Взяв из примеров все тот же «blink», выбрав в «плата» — Arduino Pro or Pro Mini:

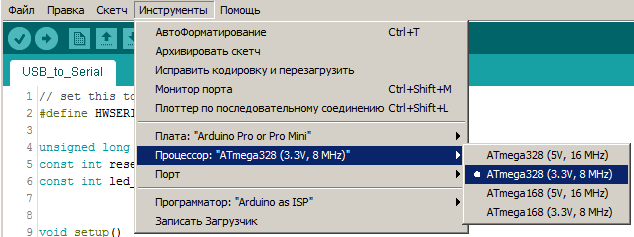
«Процессор» — ATmega328 (3.3V, 8 MHz):

И нажал «Вгрузить».
Светодиод победно замигал и стало ясно что получилось!
Вот так, имея под рукой Leonardo или Teensy, можно без всяких SPI прошить любую mini. Или использовать его как USB to serial и общаться со своим роутером.
Автор: Лжедмитрий 2.0
Источник [4]
Сайт-источник PVSM.RU: https://www.pvsm.ru
Путь до страницы источника: https://www.pvsm.ru/pesochnitsa/114595
Ссылки в тексте:
[1] конвертера: http://amperka.ru/product/usb-serial-converter
[2] статью: https://petervanhoyweghen.wordpress.com/2012/11/08/using-the-leonardo-as-usb-to-serial-converter/
[3] комментарий: https://github.com/arduino/Arduino/pull/3343#issuecomment-115045979
[4] Источник: http://geektimes.ru/sandbox/3288/
Нажмите здесь для печати.